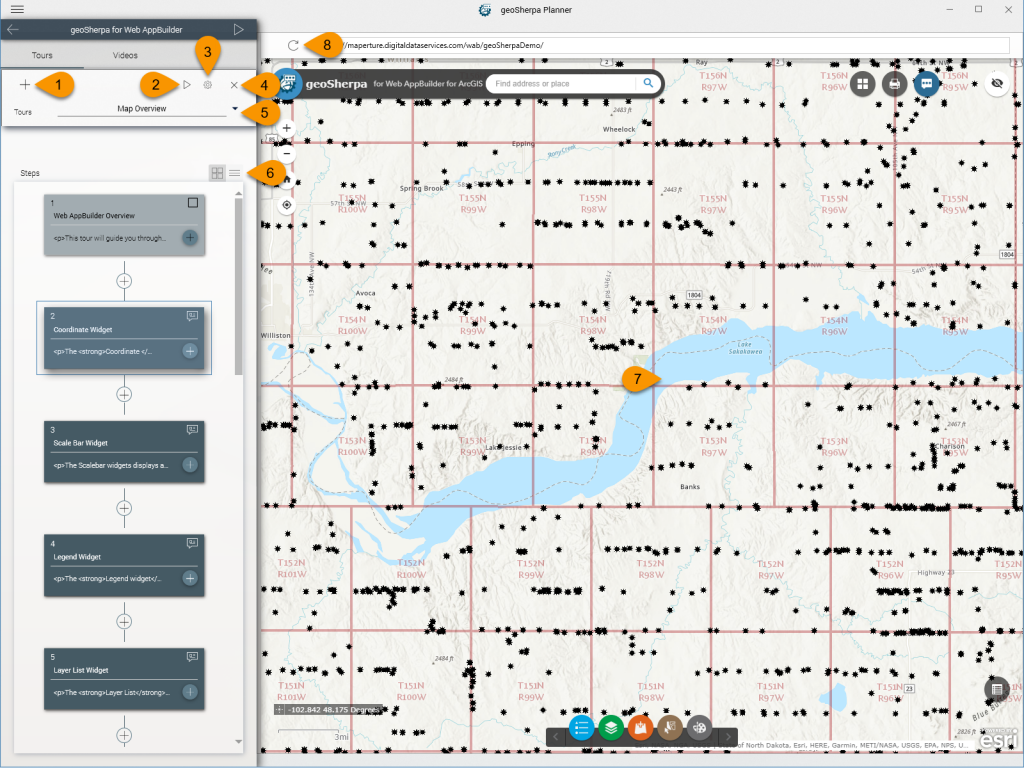
When you start editing a geoSherpa Guide, the default view will be the Tour Manager. This page provides an overview of the functionality on the Tour Manager. To switch to the Video or FAQ Manager, click on the appropriate heading.
1. Create Tour
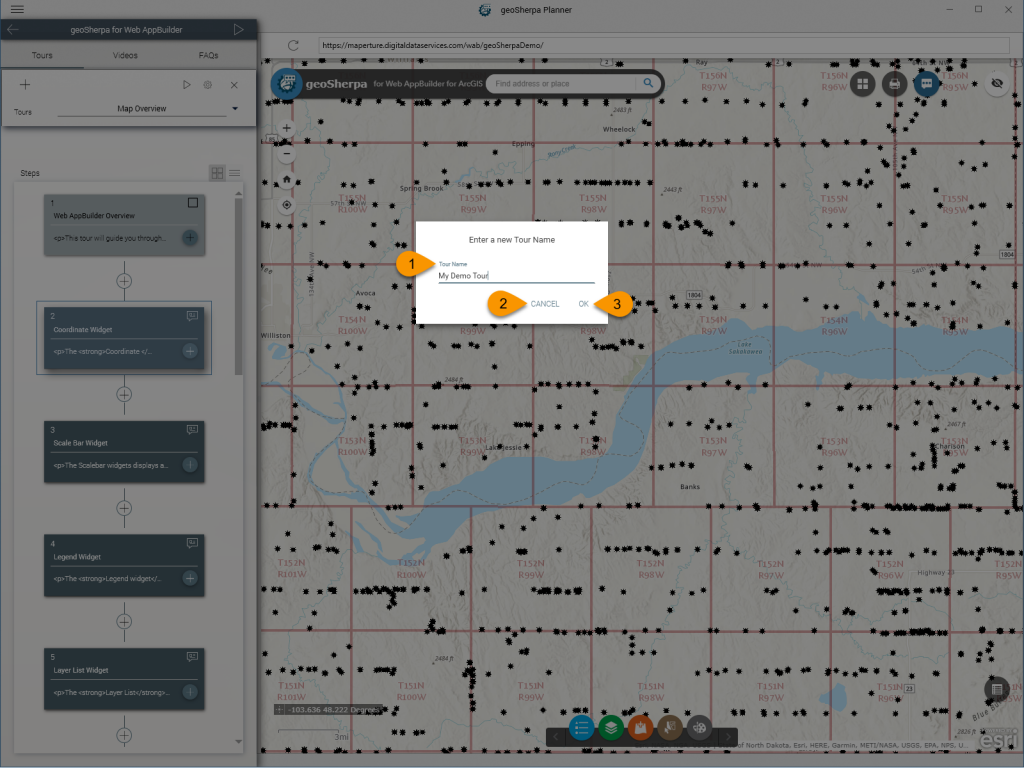
Use Create Tour to create a new geoSherpa Tour. This will open a dialog to allow you to enter the Tour name.
1. Tour Name
Enter the name of the tour, as it will be displayed within geoSherpa. This can be a title or question. It is also good to be descriptive as the title is searchable to assist your users.
2. Cancel Button
If you do not want to create a Tour, click Cancel.
3. Save Button
Click Save to create a new empty Tour.
2. Preview Tour
Use the Preview Tour to test the functionality of your Tour within geoSherpa Planner.
The Preview functionality does not replace specific browser testing.
3. Tour Settings
The Tour Settings control how your Tour is displayed to the end user. This is separated into two panels. Style Effects Panel controls how the geoSherpa widget/module is displayed. The Effects Panel controls how geoSherpa highlights your web GIS application.
These settings can change all the Tour Steps individual styles or only for new Tour Steps as they are created. As a reminder, each Tour Step can be individually styled the same way.
4. Delete Tour
Deletes the selected tour.
5. Tour Selector
Use the Tour Selector to switch between Tours and to reorder them.
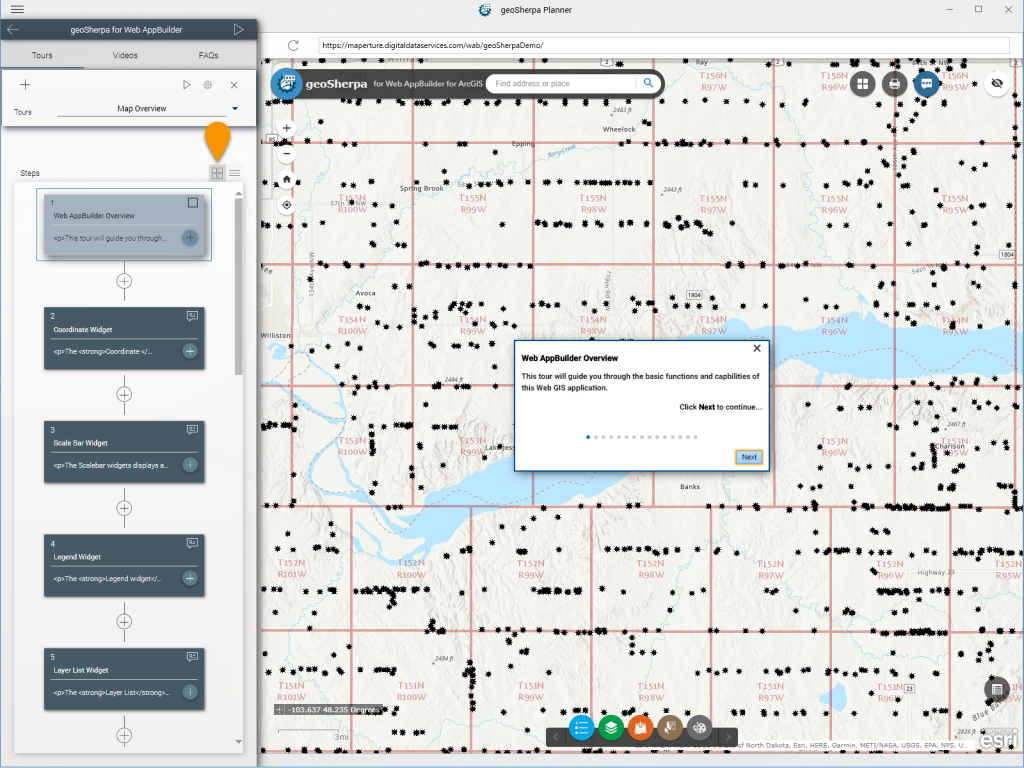
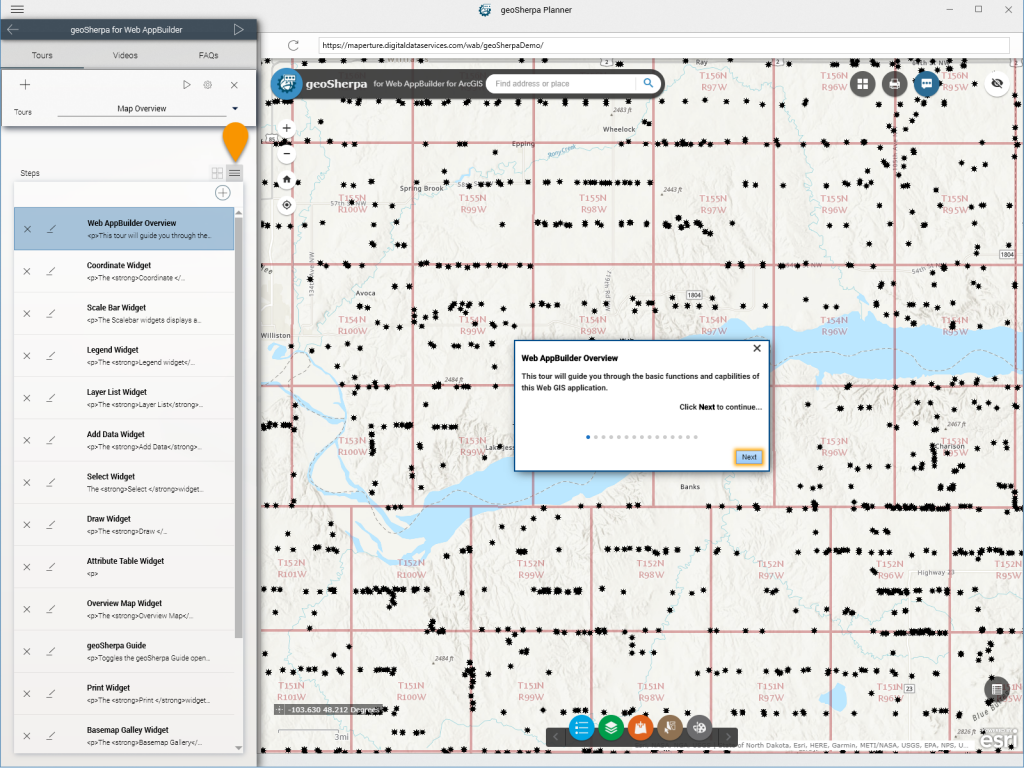
6. Tour View Option
You can toggle between a dialog (default) and list view to manage your Tour steps.
7. Map Preview
The Map Preview area is where you will identify, test, and build your Tours.
8. Map Refresh
Use the Map Refresh button to restore reload your site.


